Saturday, August 30, 2014

Thrift Finds: Mirror and Shoes

I went to a new (ish) thrift store near my house, and I picked up these two great finds!

Shoes and Mirror: $7.70 No Tax.
Maybe it grosses you out to buy shoes from the thrift store. My advice? Don't buy ones that look gross, and as long as you sanitize them when you get home, you'll be fine. Probably. I mean, I'm not making guarantees here, but I've never had any issues with thrift shoes.

This mirror has so much personality!
I'm excited to hang this mirror in my bathroom. I have another one that's similar to it, and they'll look great together.

These shoes are like new and fit perfectly!
All these shoes need is a good old fashioned sanitizing, and then they're good to go and start living their new lives on my feet.

Maybe you feel like the thrift store is a place to buy costumes, or a place to buy clothes you want to refashion. Thrift stores are obviously great for both those things, and they're great for finding vintage or antique items. However, they're also great for finding just cool, cheap stuff that you can totally use or wear as is. Give your local thrift store a shot. You (hopefully) won't be disappointed.


DIY: Melted CD Earrings

My friend told me about a guy she used to know that melted CDs and turned them into cool earrings. I got inspired, and I gave the internets a quick surfing. I found this post, and I thought, "Obviously I can do this, and it will be way cool."

Necessary Supplies:

  • CDs. I personally used one I had labelled "vareity mix" from when I was like twelve. 
  • Something to cut your CD up with.
  • A pot for boiling water (optional).
  • Oven or toaster oven to melt your earrings in.
  • Parchment paper or similar to set the earrings on while they are melting.
  • Earring wires. 

The Process:

I started trying to cut up a CD with some old garden shears. It turns out, it's really hard to do. I called Karen and asked for her expert advice, and she said she'd seen people on Pinterest boil CDs before trying to cut them, so I tried that.

Boil, my pretties!

Unfortunately, my experience was that boiling the CDs made no difference in cutting ease. Maybe try something more effective than garden shears.

After cutting them out, I put the pieces together in cool shapes on my parchment-lined cookie sheet and popped them in the toaster oven at a blazing 450 degrees.


They melted fantastically. What I didn't properly anticipate was the difficulty in getting the earring wire hook things in there. What I ended up doing was taking them out and trying to drill holes into them with the wires, the earrings cooling to much, and putting them back in like twenty or so times. Oh, and I burned my fingers. Like, many times. 

The Results:


I'm happy with how they turned out. They're cool. But I really didn't love the experience, and I don't have any plans to try it again. But if you're a fan of melting stuff and sticking wires into it, this is totally the project for you!

Also, melting plastic probably releases toxic fumes, so yeah. Make your choices. 

Wednesday, August 27, 2014

Shopping Success Tip: Try it on!

In the Shopping Success series, I'm going to offer some tips from my extensive experience surfing thrift and clearance racks. Trust me...I'm kind of a professional. I mean, I've been doing this since I was pretty much a kid so heed my words of great wisdom.

Today's installment: Try it on!

Does this outdated phone make me look fat?
 I understand that trying on clothes at the thrift store can seem kind of, well, gross to some of us. It is kind of gross in some ways if you think about it. BUT. That's what showers and lots and lots of gel hand sanitizer are for.

And just because something you found on the clearance rack is extremely cheap, it doesn't mean that it's not worth the time it takes to try it on.

Even if the item you find is really inexpensive, if you plan to wear it yourself please try it on before you buy it. Thrift store or clearance rack, this is an important rule. If you buy something because it's really cheap and find later on that it doesn't fit you well, you've wasted money that could have gone toward something you really would have liked. And, because a lot of stores have iffy return policies when it comes to thrift or clearance, you are very likely stuck with what you purchase.

Also, keep this in mind: if it's on the clearance rack or in the thrift store, it might be there for a reason. Maybe a pair of pants ended up on the clearance rack because it didn't look flattering on most people and therefore the style didn't sell well. Or perhaps a shirt at the thrift store is there because the sleeves were too tight for the previous owner. Whatever the reason, there's a decent chance the item was rejected because something about it was found to be lacking. Are YOU the one who this clothing item will magically fit? Maybe! But you need to try it on before you commit.

So suck it up, try it on, and then go home and take a shower if you feel like you need to.

Monday, August 25, 2014

Blue or Purple?

I LOVE this dress. I got it at the thrift store for like $5. Just like this. There were no changes needed. OK, so maybe I took in the sides a tiny little bit, but I didn't even have to do it.

This dress is awesome, and someone just got rid of it, and then I got to buy it, and now I get to wear it, and I love it. So, yeah, that rocks.


This is why it's worth digging through the racks. 

Also, this color: is it blue or purple? I say purple, but it's kind of in that weird middle ground where some people say it's blue. 

Sunday, August 24, 2014

DIY: Jacket Dyeing Renewal

I bought this jacket ages and ages ago, like I was in high school when I bought this. I wore it a lot back when I bought it, but for some reason even though I've kept the jacket all these years, I haven't really been wearing it much for a long time.

The original state of the jacket. Yeah, that pin is covering up a stain.


When I did this dye experiment, I decided to take a chance and throw this old jacket in the dye as well. This was the result.

I didn't take a lot of care to make sure the fabric dyed evenly, and I love the uneven look of the color. AND you can't see the stain anymore.


I love the look of the buttons, which didn't take the dye, along with the dyed fabric.


Here's the cool part: since I dyed this jacket a few weeks ago, I've worn it like six times. It's awesome, and this jacket totally has a new life now. I'm definitely going to try dying other pieces that I've stopped wearing.

Saturday, August 23, 2014

DIY Lattice T-Shirt

I was inspired by this tutorial to update a simple t-shirt into something awesome.
The shirt inspiration looks like this:
WobiSobi
 And this was my victim:
...a simple v-neck tee I picked up from the thrift store a while ago (it came from Target originally). It had fallen into obscurity in my closet. It doesn't exactly scream EXCITEMENT or anything so I guess I forgot I had it. So I grabbed my scissors and began the procedure.

 Instead of studs, I sewed buttons on.


It turned out a bit rough-looking, which makes sense since there was cutting and no sewing involved (well, except the buttons). It made the shirt a lot more interesting! Not perfect, but still very nice. I had fun making it and might even try it again on another shirt someday.

"Becky" Top

Found this sweater at the thrift store.

 I like the color...kind of a pink/mauve. It is also delicate and so pretty! The great thing about it is you can wear it in all weather. It's light enough for spring and summer, but sweater-y enough for fall and winter if you add layers. It's one of those versatile clothing items that's perfect year-round.

No tag on this, but it looks late 80s/early 90s to me.
Such lovely details...

Another wonderful thrift store find :)
Here's how I'd wear it:

Becky


Friday, August 22, 2014

DIY: Dye a Dress


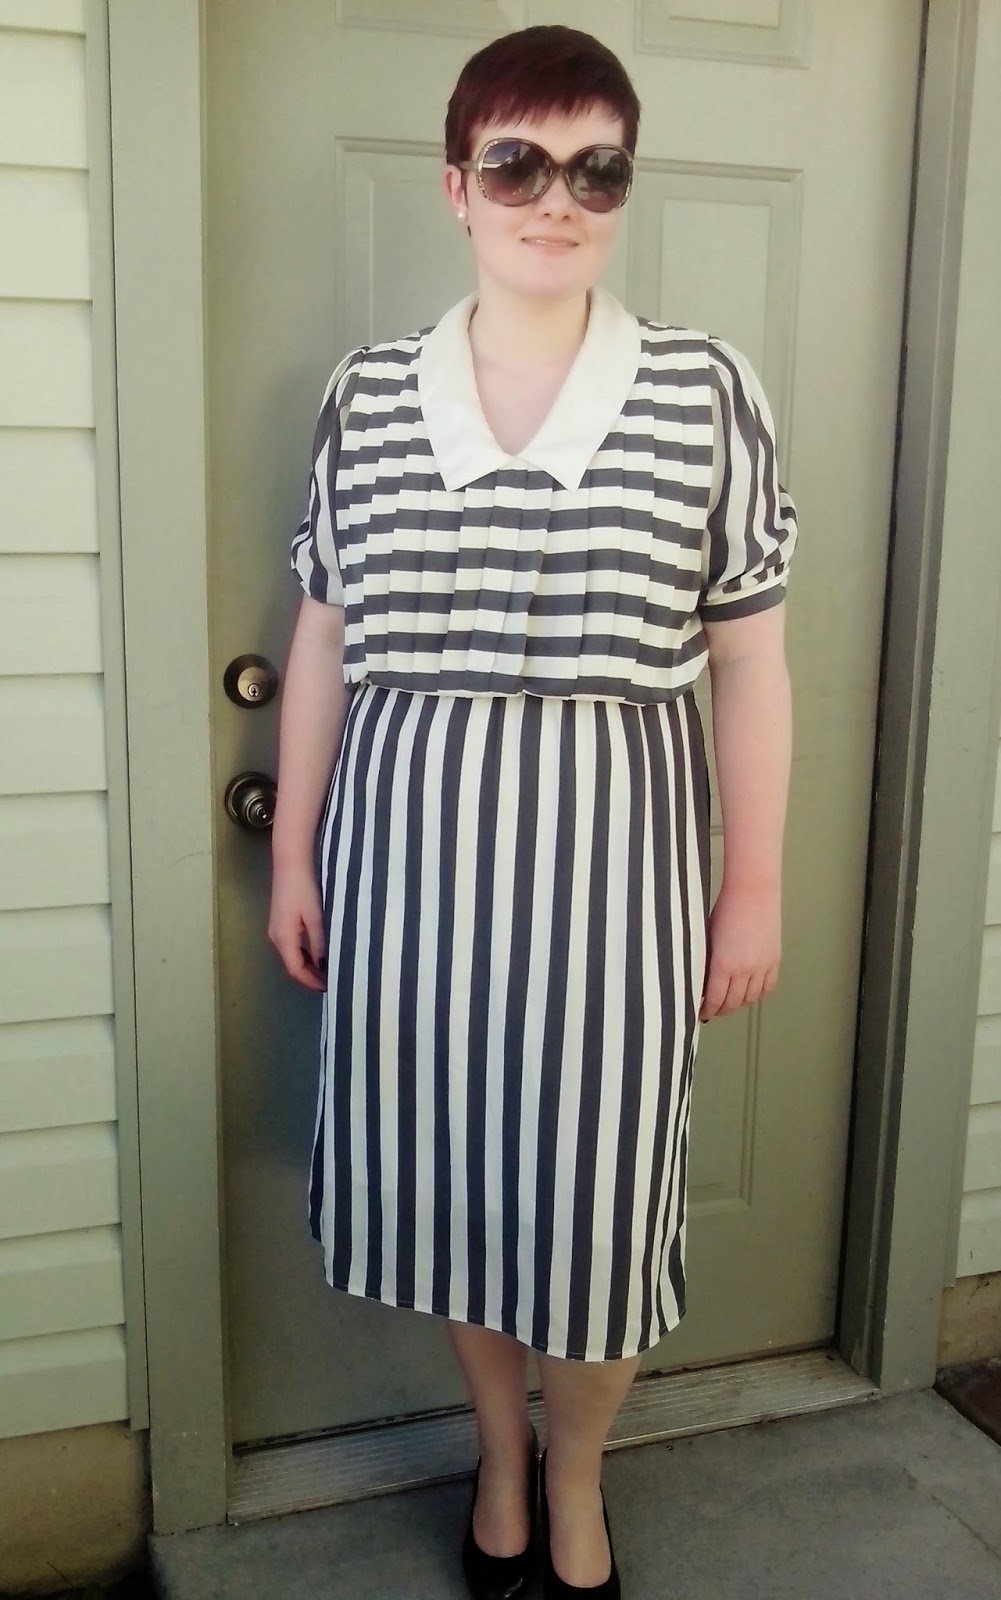
I bought this dress at the thrift store because I love the cut of the dress, but I don't like wearing white. Soooo boring. And it makes me think of weddings.  I decided this was a great time to try an experiment in dyeing. 

Although I've dyed my hair, I've never dyed clothes.

I've done a lot of dyeing with my hair (the above photo is one incarnation of my hair...), but never have I dyed clothes. This was a first, and I decided to just jump into it and experiment. 


I had picked up this Rit powder dye a bit ago, but I hadn't tried it yet. I picked up this bucket, and read up on dyeing methods. I took a few cups of very hot water and mixed in some salt (the salt like helps with dyeing cotton). I added some dye...OK, I totally didn't measure. That may have been my first mistake...


I mixed up some blue and green together, and I was hoping to achieve a teal color. After mixing in the color, I added more warm water. 


I put the dress in there and used some disposable chopsticks to stir it around and push out all the air bubbles. 

I continued to check on it, stirring it around and pushing it down, for like thirty minutes. 


An important note here: cotton dyes WONDERFULLY, but ... whatever the crap this lining of the dress is made out of does not dye at all. It didn't dye even a little tiny bit. This is fine for me, because no one's going to see it, but it was a little unexpected. 


See the color of the buttons here? That's what I was going for. For some unknown reason, the buttons dyed beautifully, but the dress... it really just didn't take in the blue at all. I've been researching this, and I can't seem to find an answer. (NOTE: you can also see in this picture that the thread on the seams didn't dye as well as the rest of the dress. The belt loops didn't dye at all).

Honestly, I don't know if the blue dye I bought just had some issue or if it didn't like the fabric (but surely cotton should be fine...), or if the green just totally overpowered it and took up all the space in the fabric fibers before the blue could get a chance. 

In the future, I will use way hotter water. Like super boiling. I think that may have been one problem. I will also actually measure the dye. Also, I think I will go for the liquid Rit in the future for better mixture with the water, and along that line, I will also try dyeing the clothes when they are already wet (that's also supposed to help with even dyeing).

Ultimately, despite the fact that the dress didn't turn out according to my dreams, I'm still happy with the experiment, and I'm totally going to wear the dress anyway. 


Wednesday, August 20, 2014

Ruffly Red

 I picked this dress up for $6, I think. It was really cool as is, but I decided to make a couple adjustments.


I shortened the dress by about four inches. In addition to hemming it, I cut out the shoulder pads and stitched together the top so it won't accidentally come open. 


Now it's time for a silly gif.


Sunday, August 17, 2014

$5 Grey and Cream Stripe

I picked this dress up at the thrift store for $5. It had shoulder pads, and there was a makeup stain on the collar. 


I cut out the shoulder pads, and I was able to remove the makeup. 


I've never heard of this brand before. Also, I don't know in what universe this dress is a size six, but I like it.